Your first three lanes
This lesson follows the official Lane Tool demo. By the end you’ll have used both ways drawtonomy creates lanes:
- Center Line mode — draw the centerline; left and right boundaries are generated for you.
- Boundary mode — pick two existing boundary linestrings and drawtonomy fits a lane between them.
The demo draws two lanes in Center Line mode, then switches to Boundary mode for a third lane that fills the gap.
1. Pick the Lane tool
Section titled “1. Pick the Lane tool”Open drawtonomy.com. Press N (or click the lane icon in the bottom toolbar).
The right side of the screen now shows the Lane creation panel, with Center Line selected by default:
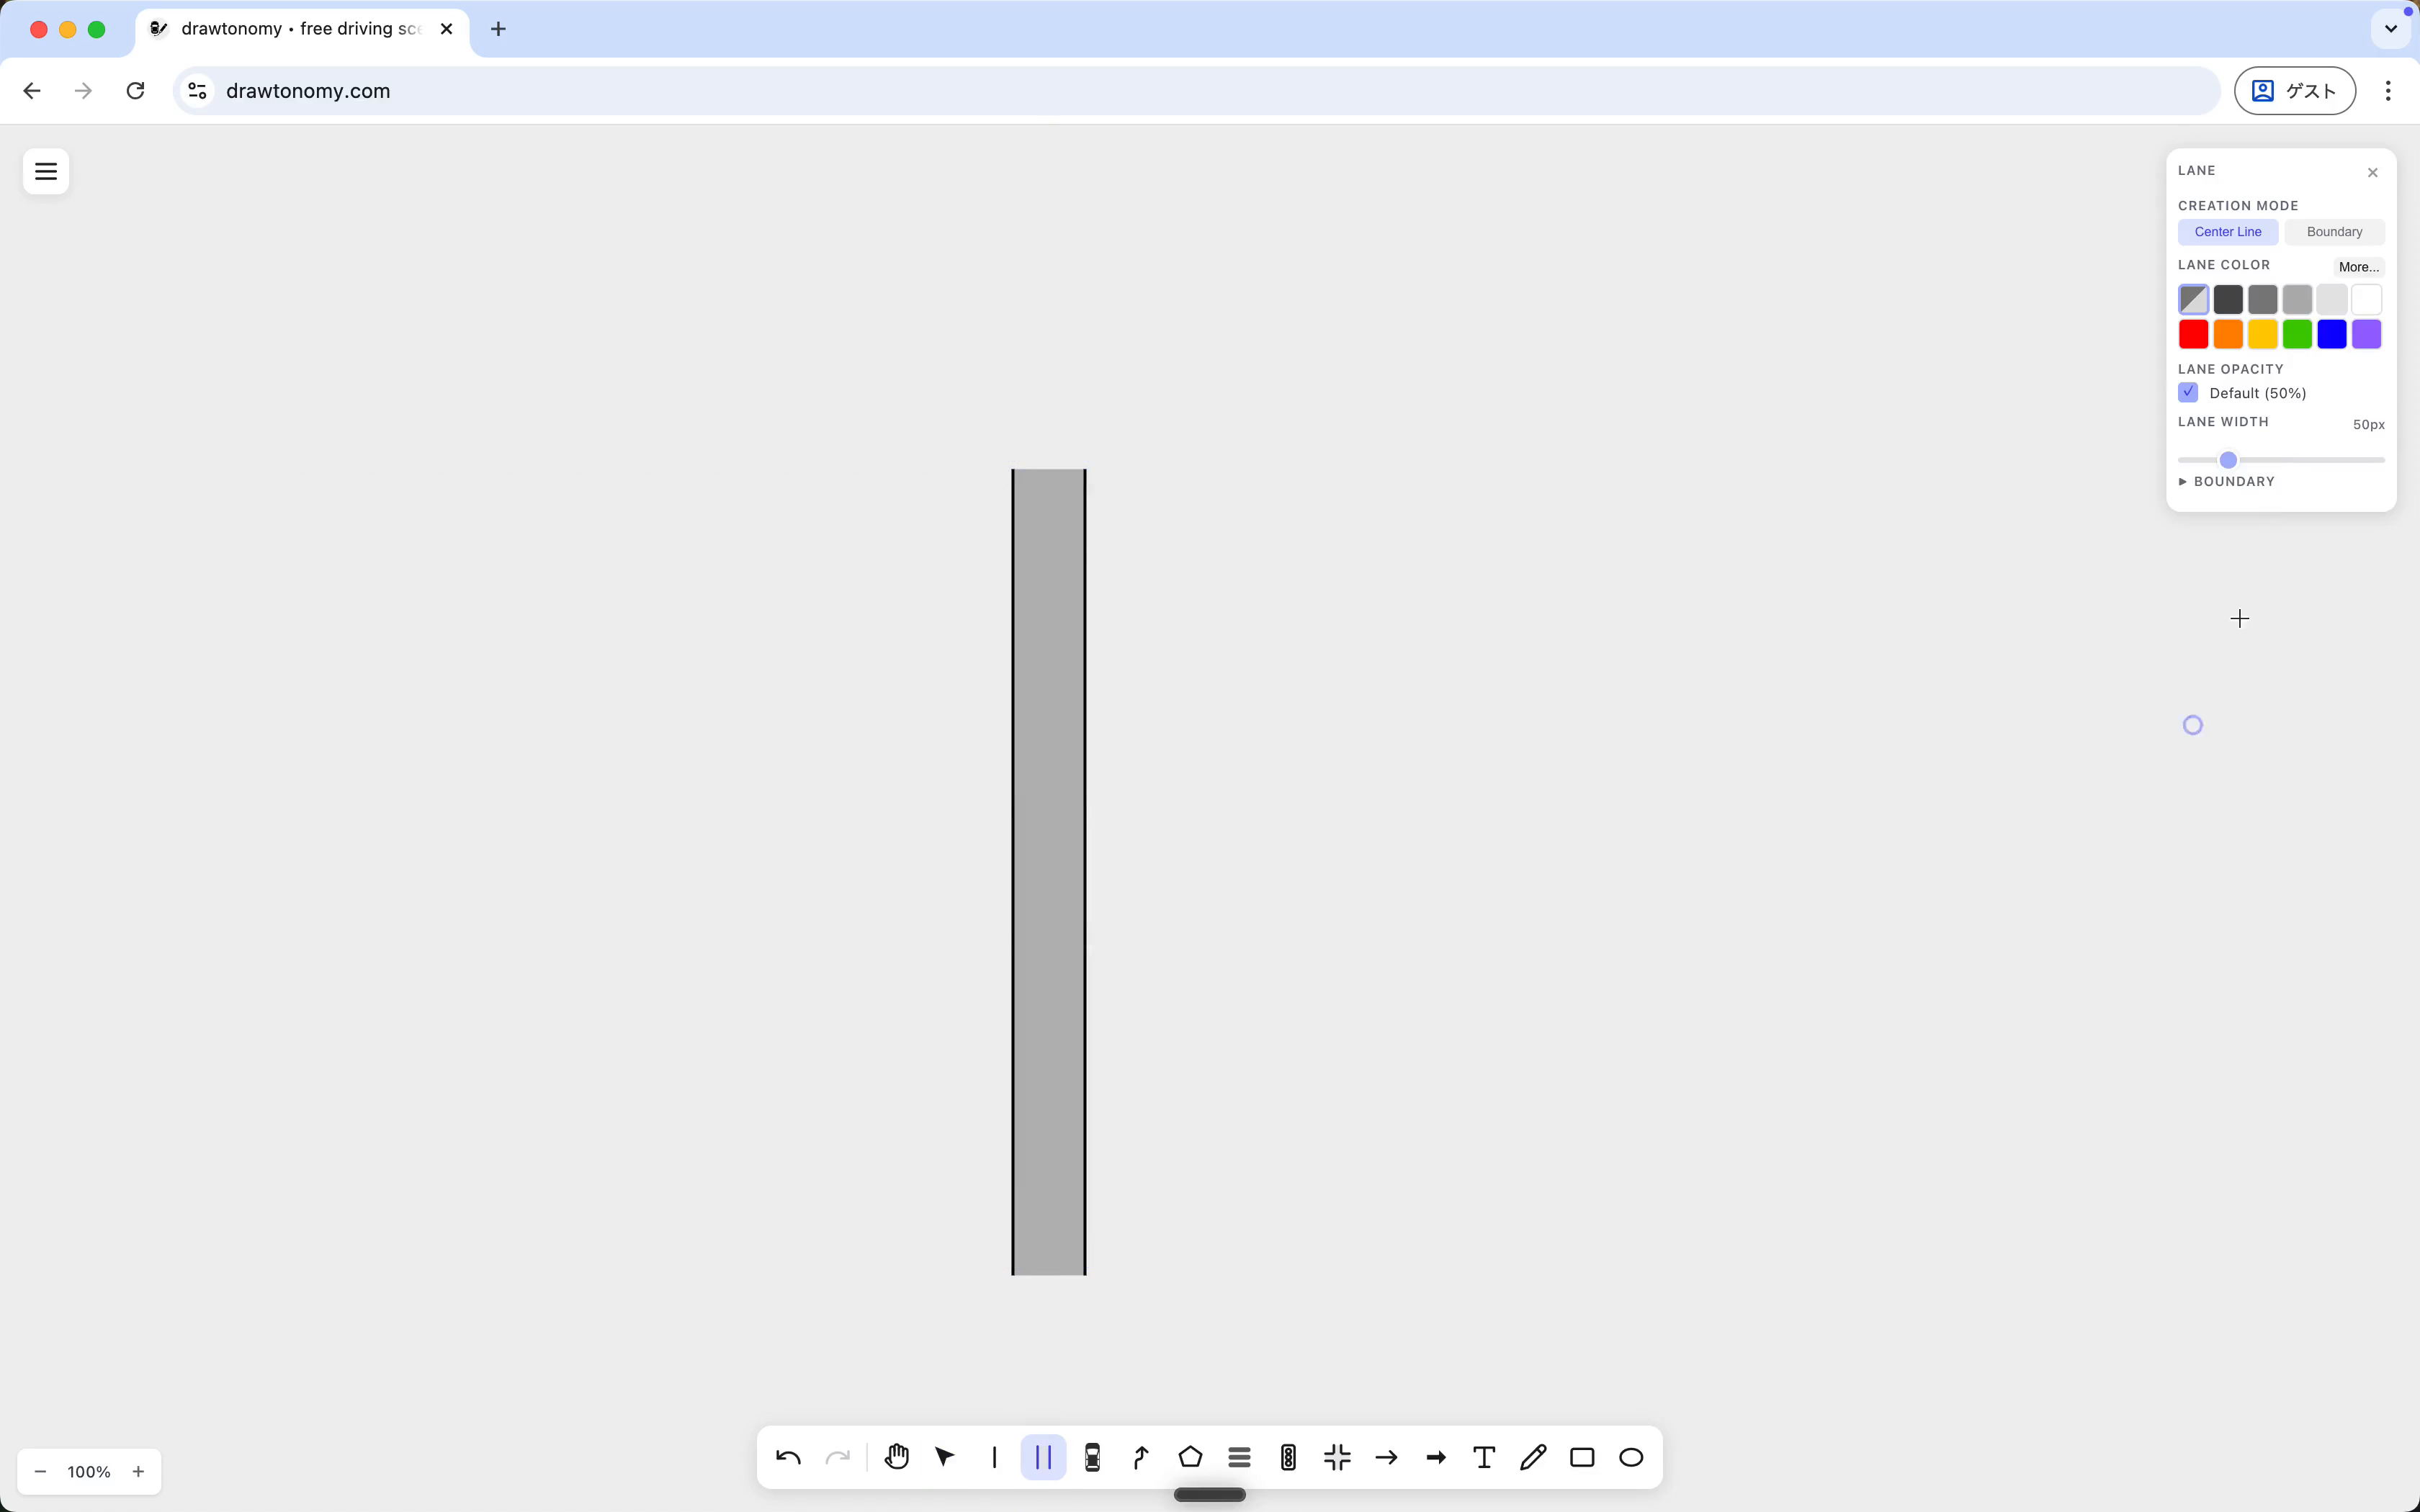
Leave the defaults for now.
2. Draw two lanes in Center Line mode
Section titled “2. Draw two lanes in Center Line mode”In Center Line mode, click on the canvas to drop the first centerline point, click again further along to drop the next, and press Enter to finish. The left and right boundaries appear automatically using the Lane Width value (50 px by default).
The Lane tool stays active after each lane, so click again somewhere else to start the second one. Drop a couple of points to the right of the first lane and press Enter:
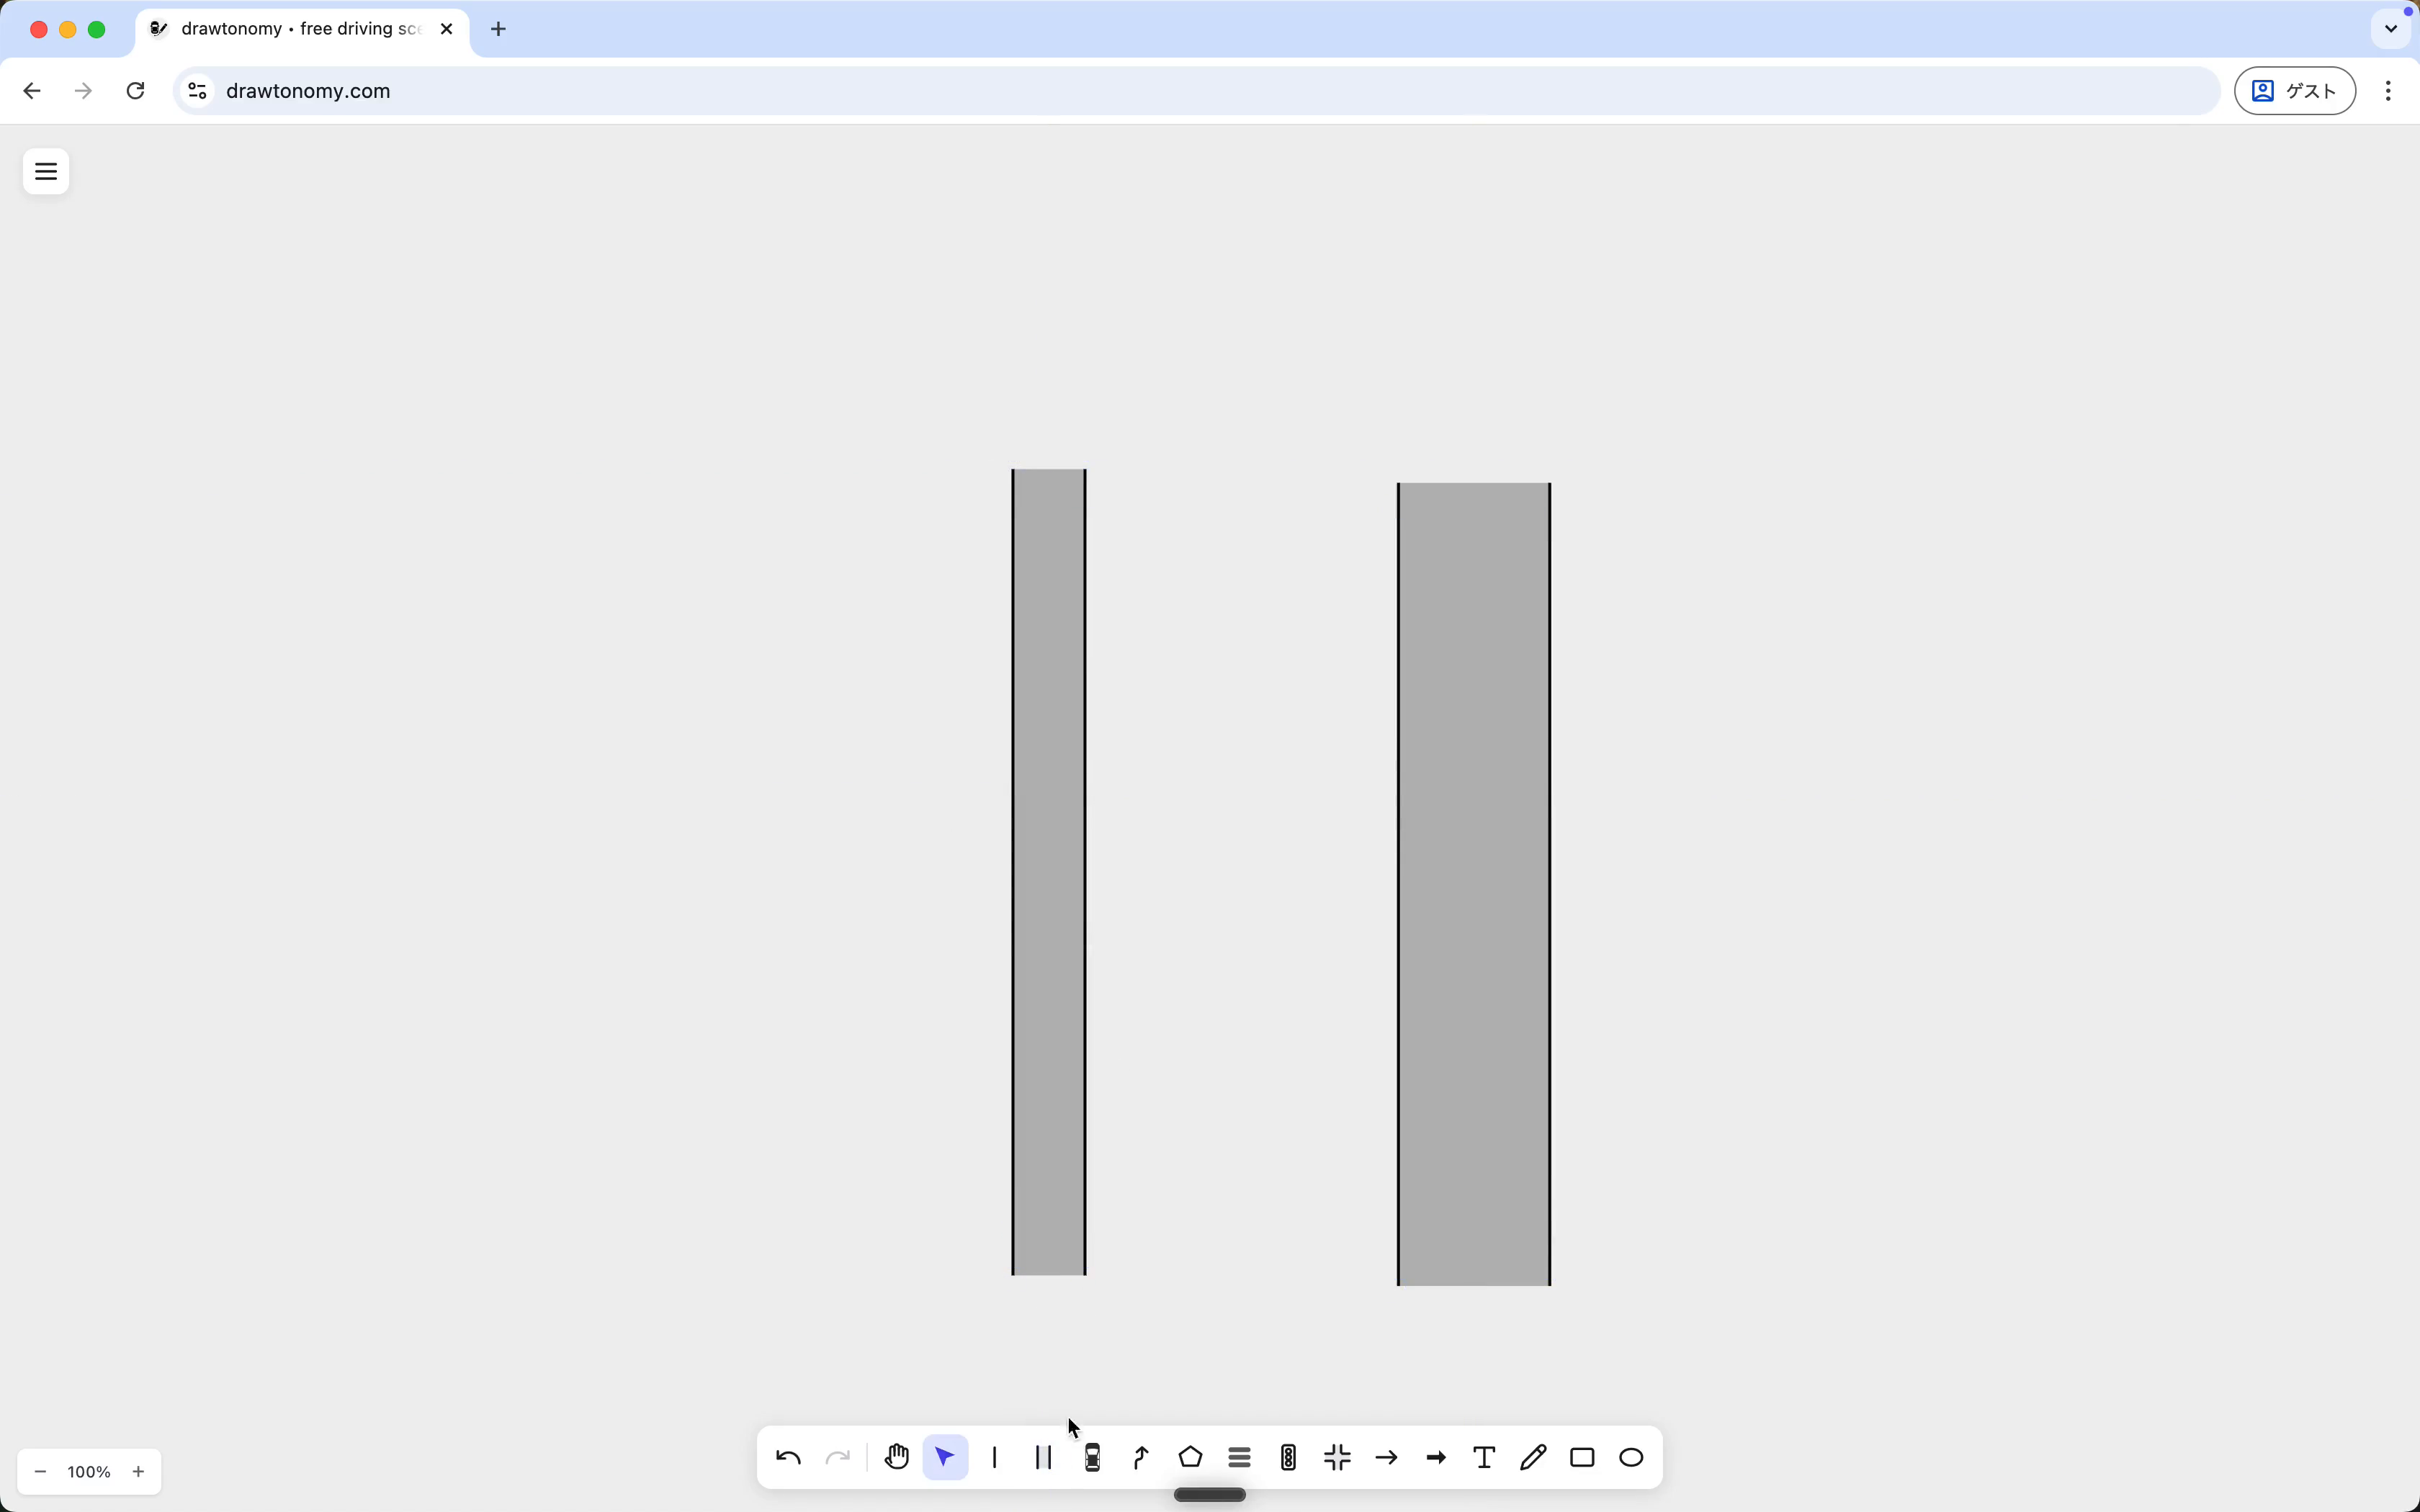
Right now the two lanes are independent — they don’t share a boundary or know about each other.
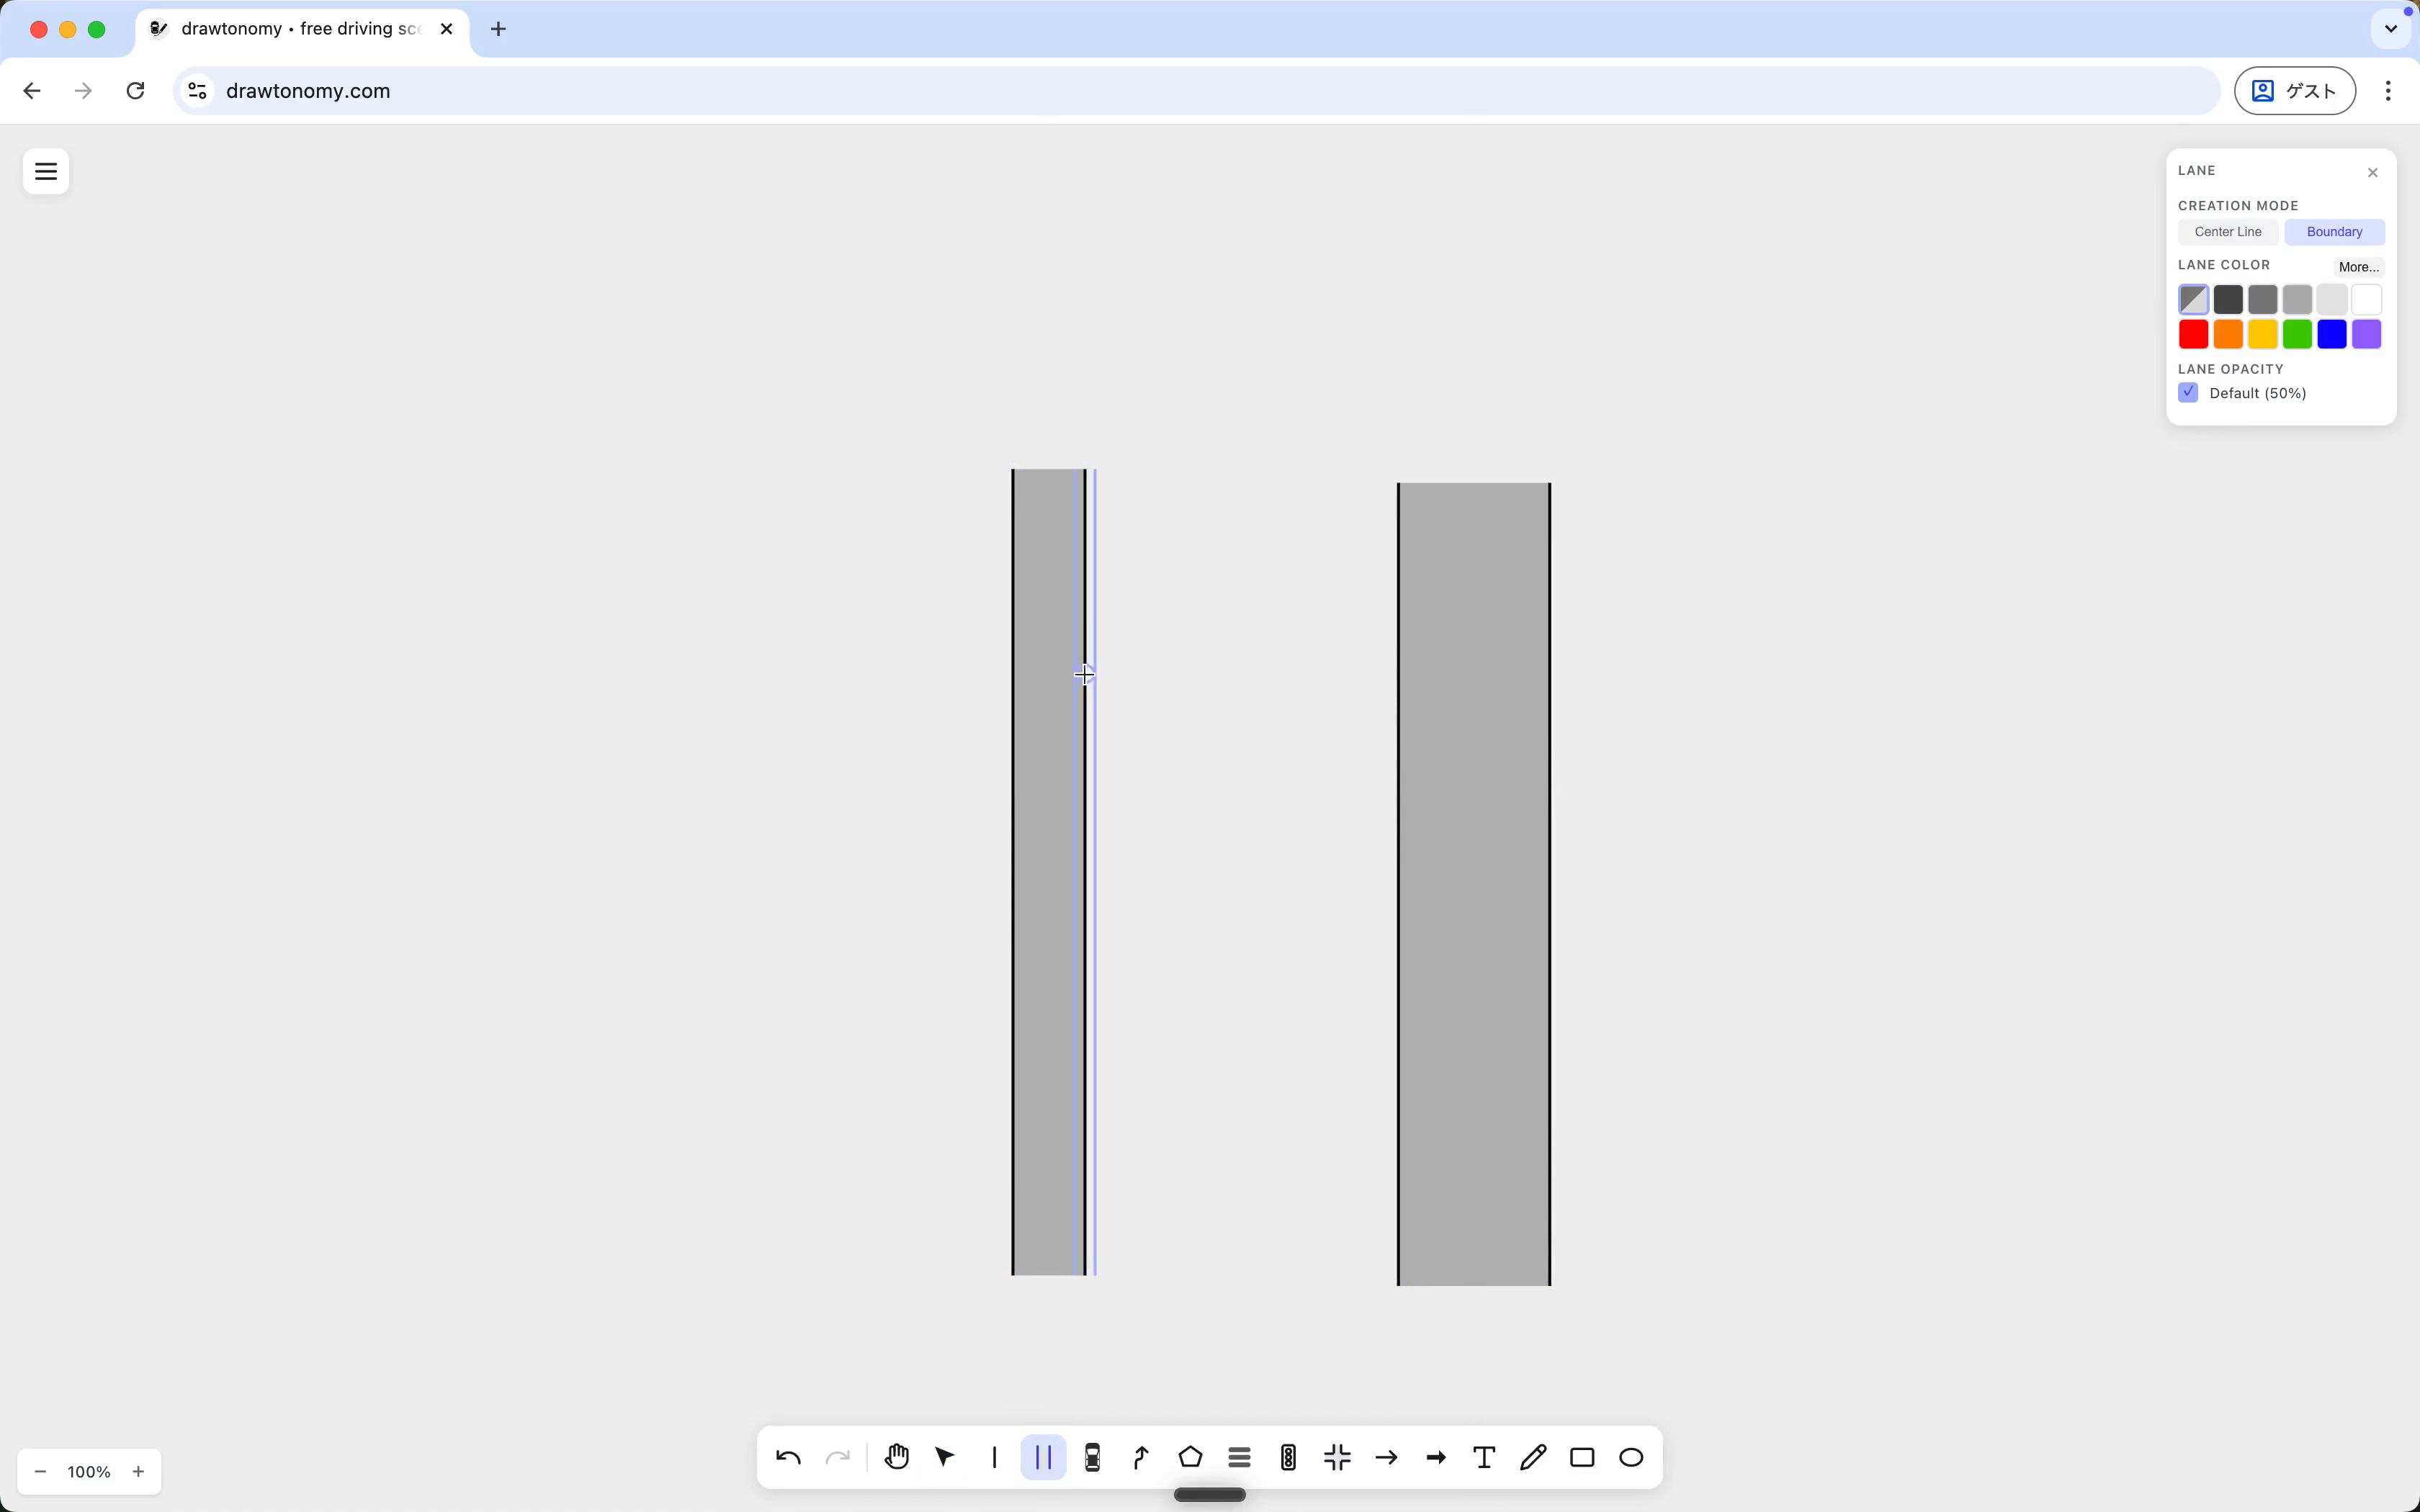
3. Switch to Boundary mode
Section titled “3. Switch to Boundary mode”Click Boundary in the same panel, next to Center Line, to switch creation modes. In Boundary mode you don’t click empty space; you click existing boundary linestrings, and drawtonomy fits a lane between them.
Hover the right boundary of the left lane — drawtonomy highlights the linestring in indigo when the cursor is close enough — and click:
Then click the left boundary of the right lane. A new lane fills the gap, using both clicked linestrings as its left and right boundaries.
4. Inspect the result
Section titled “4. Inspect the result”Press V for the Select tool and click the new middle lane. The right panel switches to its attributes:
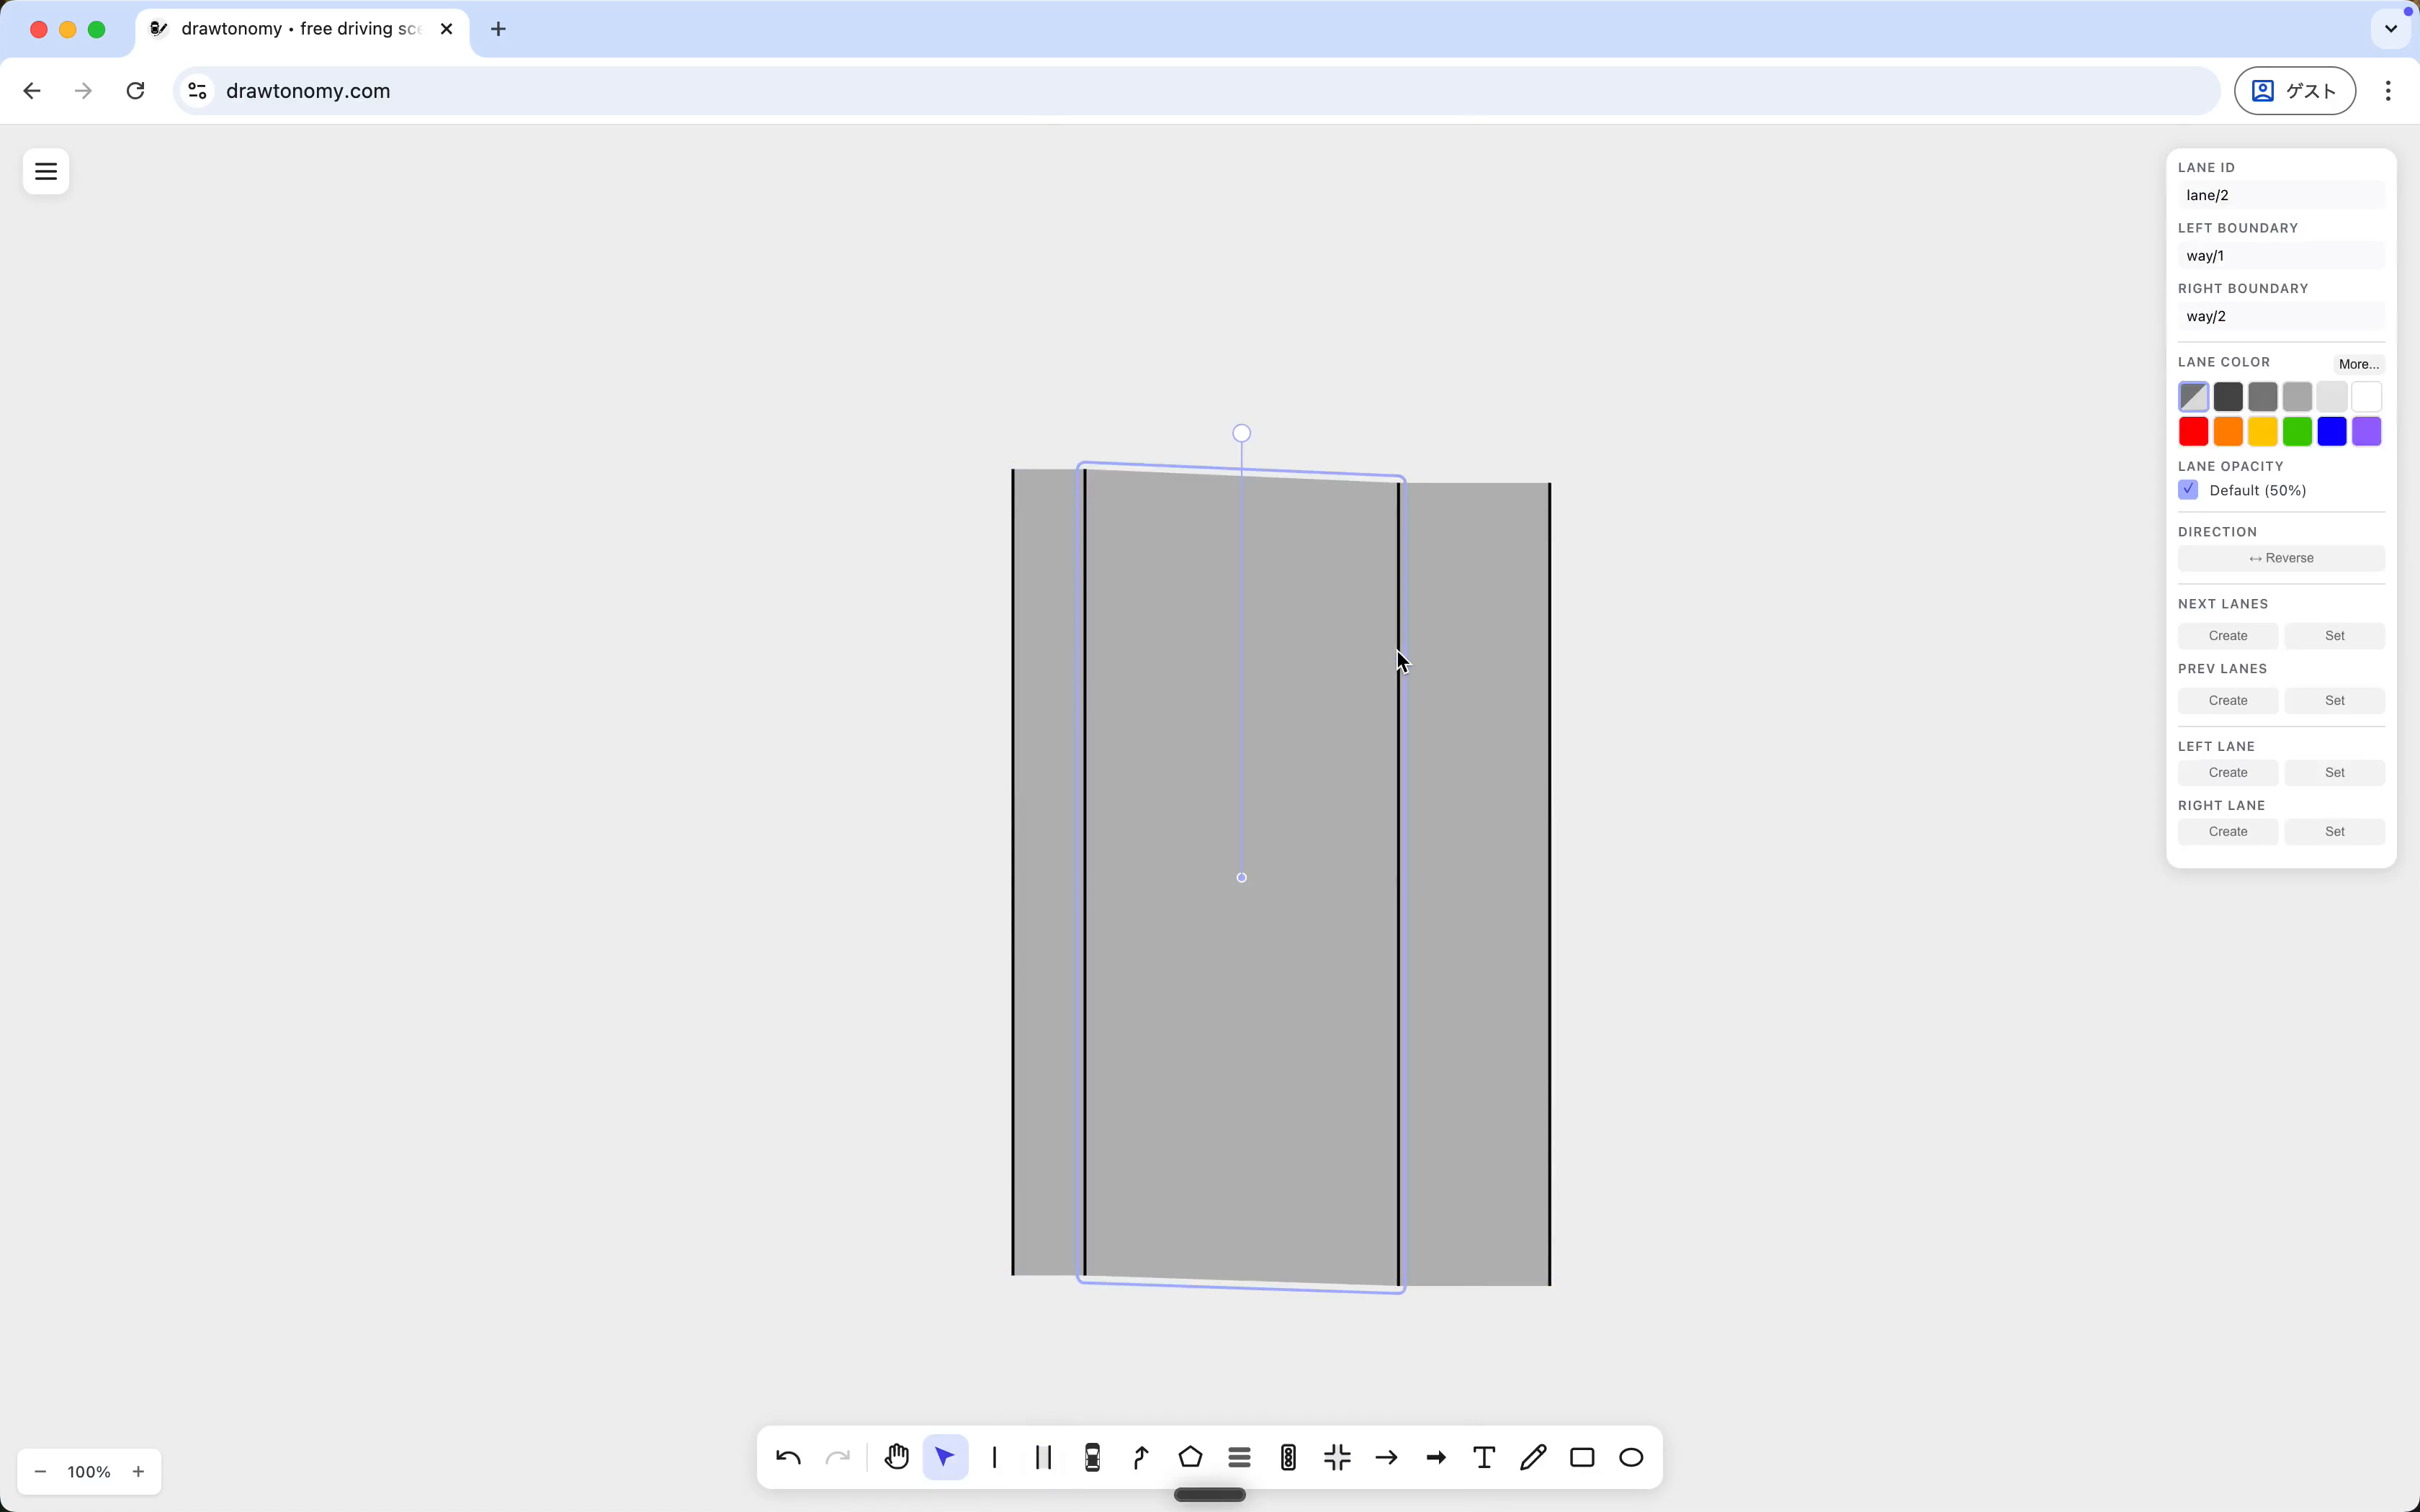
The boundaries are reused:
- Lane ID —
lane/2, a brand-new lane. - Left Boundary —
way/1, the same linestring that’s the right boundary of the left lane. - Right Boundary —
way/2, likewise shared with the right lane.
Because the boundaries are shared, dragging a point on either side moves both adjoining lanes together. That’s what lane connections are built on; read that page next for the underlying model.
The panel also exposes Direction, Lane Color, Lane Opacity, and the four connection slots Next Lanes / Prev Lanes / Left Lane / Right Lane, which we leave empty for now.
What you learned
Section titled “What you learned”- Lanes can be drawn two ways: from a centerline, or by picking two existing boundary linestrings.
- Center Line mode is the fast option for an empty canvas; Boundary mode slots a lane between existing geometry without redrawing anything.
- A lane built from existing boundaries shares those boundaries with its neighbours.
What’s next
Section titled “What’s next”- Manage lane connections — the four connection slots in the Attribute Panel.
- Smooth lane boundaries — the Smooth Boundary toggle in the same panel turns angular boundaries into curves.
- Recreate a real road from a satellite map — pull lanes from OSM instead of drawing them.